

5 reasons swirl marks come back after polishing
You polished on Saturday, the bonnet looked flawless under the garage light, and two washes later the fine circles are back. We get exactly this question in support again and again, usually phrased like this: can polish remove holograms for good? It can. If the swirls still come back, they were mostly never fully gone, or the first wash afterwards put new ones in.
Swirl marks come back after polishing for five reasons: oils in the polish only hid them, the polish came off too early, it was too fine for the scratch depth, the pad or towel added new scratches, or the first wash undid the work. You can check all five on the day you polish.
1. The polish only hid the swirls instead of removing them
The most common reason swirl marks come back after polishing is that they were never cut out in the first place: oils, silicones or waxes from the polish sit in the scratches and make them disappear for a few washes. Under the lamp it looks like corrected paint. In reality there's a film sitting on top of the scratches, and the clear coat underneath hasn't changed.
How long a film like that lasts varies. Car care forums and detailers' write-ups usually talk about a few days up to two weeks, often one to three washes. After that, shampoo and rain wash the filler out, and the spider web around every light reflection is back. Plenty of people notice it after their first trip through the car wash and assume the wash ruined the paint. Most of the time it just exposed what was never removed.
The fix is an inspection spray straight after polishing. Koch-Chemie Panel Preparation Spray "Pps" Degreaser & Inspection Spray is a ready-to-use, alcohol-based degreaser. It breaks down oil, wax and polish residue and shows you the paint as it really is. Mist one section, wipe it off in circles with a clean microfibre cloth and buff dry with a second, fresh side of the towel.
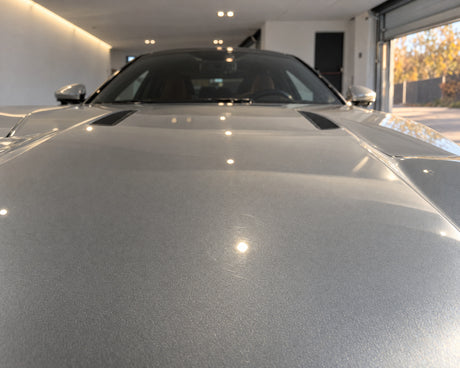
Then hit the panel at an angle with a spot light. Direct sun or shade hides the scratches again, as you can read in our five lighting mistakes with an inspection lamp. If you show your car under hall spotlights, like plenty of owners at the Auto Zürich Car Show today, you'll quickly learn that light like that doesn't forgive a single leftover circle.
If you mix isopropyl alcohol with water yourself, forums mostly quote 10 to 15 percent. Higher concentrations aren't needed on fresh paint, and Pps saves you the mixing. What comes next matters too: the inspection spray leaves no protective layer behind.
If you still see swirls after the wipe-down, that's not a setback, it's the honest answer, and you polish that spot again. Polishes free of silicone oil, like the two in the setup below, make this check easier because they leave hardly any filler on the paint themselves.
2. Polish wiped off too early leaves new holograms
A lot of modern polishes use abrasives that break down as you work, and if you wipe them off before they've gone fine, you leave behind an even haze of new micro-scratches. At first the paint looks smoother than before, but under a spot light you see cloudy holograms instead of clean circles.
You can watch it happen right on the paint. At the start the polish sits as a white, slightly crumbly film around the pad. The longer you work it, the thinner and clearer it gets, until only an almost transparent haze is left. Koch-Chemie describes it this way for Micro Cut M3.02: the aluminium oxide breaks down completely during polishing, and the finish turns clear and transparent.
That's exactly the point you need to reach before the machine comes off the paint. A working area of about 40 by 40 centimetres suits this. After priming the pad, three to four pea-sized drops per pass are enough, and you work in a cross-hatch pattern until the polish is barely visible.
The finishing step is the antidote. Koch-Chemie Micro Cut "M3.02" Micro-Abrasive Polish removes polishing haze, holograms and fine scratches down to 3,000 grit, mechanically rather than by covering them. Koch-Chemie recommends a dual-action polisher on its highest setting and a pad that's fully primed before you start. Give each section the time it needs for the haze to clear, and only then wipe off. There's more on this last step in our post on the hologram-free finish.
One factor gets underestimated this time of year: temperature. At around 5 degrees, like outside today, polish turns thick, spreads badly and breaks down unevenly. Bring the car into a garage and let the panels come up to temperature before you start. In blazing summer sun the opposite happens, and the polish dries on before it's finished. Both end in the same haze.

3. A polish that's too fine only rounds off the scratches
If the polish is too fine for the depth of the swirls, it only softens the sharp edges of the scratches instead of levelling the paint down to the bottom of them. The scratches then reflect less light and seem to be gone. The next bit of light wear or a different light angle brings them right back.
The numbers explain why. Typical wash scratches go about 1 to 3 micrometres deep, and the clear coat on a modern car is usually 35 to 80 micrometres thick. One pass with a cutting compound takes off roughly 1 to 5 micrometres, a very fine finishing polish a lot less.
If the cut doesn't reach the bottom of the scratch, you're left with a rounded groove. Then there's the paint itself. Hard clear coats, the kind many German manufacturers use, need a stronger polish just to level the scratch edges. Soft paints, common on many Japanese brands, react faster.
A taped-off test spot tells you whether you need to step up. Start with Koch-Chemie Fine Cut "F6.01" Cutting Polish (Fine) on the Koch-Chemie Fine Cut Foam Pad "Gelb" Medium-Hard Cutting Pad / Polishing Pad (2024). With a cut level of 6.0 and a gloss level of 7.0, it removes car wash scratches and sanding marks from 2,500 grit abrasives.
The medium-hard yellow pad is matched to exactly this polish. Then you check with Pps. If the swirls are gone, M3.02 follows as the finish. If you still see rings, do a second pass, and only if that isn't enough either, go one step more aggressive. How to pick the right machine for it is covered in our comparison dual action or rotary.
A question customers often ask here is whether swirls can be removed in a single pass. With light wash scratches on medium-hard paint, that often works. With deeper marks on hard paint, usually not. And one thing always holds: clear coat doesn't grow back. If your fingernail catches in a scratch, it's too deep for any polish. Other ways to tell are in our post on five signs a scratch is too deep.
4. A loaded pad and the wrong towel add new scratches
A pad loaded with removed paint and old polish, plus a hard or dirty towel for the wipe-off, will sand new, fine scratches into the very panel you've just corrected. Then the problem isn't in the paint, it's in your tools. That's why some panels look worse right after the wipe-down than they did under the machine.
With every pass, the pad picks up polish residue and the finest paint dust. If you don't clean it, it clogs up, and the loosened material works its way back into the surface. That's why pros clean the pad after every section or every second one. They blow it out with compressed air, brush it off or rub it clean with a dry microfibre cloth.
Once a pad is saturated, grab a fresh one and wash the old one out in a bucket after the session. The same goes for the towel when you wipe off the polish: one grain in the pile is enough to drag a new scratch across half the bonnet.
For the wipe-off you want a soft, edgeless towel on the paint. The Koch-Chemie Polish and Sealing Towel 520GSM Microfibre Cloth has 520 g/m², an ultrasonically cut edge instead of a stitched hem and two differently textured sides, made from 80 percent polyester and 20 percent polyamide. Fold it into quarters and you get eight wiping faces.
Use a fresh side for every section, and a towel that's hit the floor doesn't go back on the paint, it goes in the wash. The set comes with five towels, enough for clean changes across the whole car.
For the wipe-off itself, light pressure helps. Lay the towel flat, wipe without force and let the fibres pick up the residue. Notice you have to rub hard because the polish is sticking to the paint? Then it usually wasn't fully worked in, and you're back at reason 2.

5. The first wash afterwards brings the swirls back
Freshly polished paint is unprotected, and if the same wash routine runs as before, within a few weeks you'll get exactly the circular scratches you just removed. In this case the swirls really were gone. These are new ones, with the same cause as the first time.
Most swirls come from washing and drying. Rotating brushes at the car wash, a wash mitt with sand in the pile or a dry, rough towel on the paint drag dirt particles across the surface. Every wash adds a few fine marks, until after a few months the spider web is back around the lamp. If you change nothing about your wash between two polishing sessions, every correction burns a few micrometres of clear coat on a problem you could avoid.
The fix lives in your wash routine: the two-bucket method, a clean wash mitt, no brush car wash and a soft drying towel. What that looks like step by step is in our post Washing your car right, without swirls. On top of that comes protection for the freshly polished panel. After the check with Pps, the paint is grease-free and ready for wax, sealant or a coating, which bonds well to it. A slick protective layer lets dirt slide off more easily and makes every wash gentler.
One honest limit here: even a ceramic coating doesn't make paint scratch-proof. It's only a few micrometres thin, lowers friction and delays new swirls, but it doesn't prevent them. The 9H rating describes a pencil hardness test, not a promise against wash scratches. In the end, only technique deals with reason 5.
Five products cover inspection, correction and wipe-off
Reasons 1 to 4 can be solved with five products, reason 5 only with the right wash routine. The setup follows the order of the work: inspect, correct, finish, wipe off clean and inspect again. You'll find more polishing stages in our range of Polishes, and more foam in Polishing Pads.
Pps is the most important tool on the list, because before and after every stage it shows you where you stand. The 500 ml spray bottle is good for plenty of checks. Its limit: it doesn't correct anything and doesn't protect anything, it only shows. F6.01 on the yellow Fine Cut Pad is the correction stage for car wash scratches.
Buyers rate the 1 litre bottle 5.0 out of 5 stars across five reviews and praise it for medium defects. Its limit is deep scratches, where its cut level isn't enough. The pad comes in sizes from 45 to 150 millimetres, to match your backing plate.
M3.02 then takes the fine haze out of the panel and brings out the gloss on dark paint. On its own it only removes scratches down to 3,000 grit, so it's too fine for car wash marks. If you polish rarely, go for the 250 ml bottle, and for several cars the litre pays off.
The Polish and Sealing Towel 520GSM closes the chain. With the five-pack you have a fresh towel for every stage, and it's also made for the sealant that follows. Its limit is quantity: five towels are enough for one car, and if you polish several cars a day, you'll need a second set.
A polisher is part of the job, but it's not on this list because you probably already own one. A dual-action polisher suits both polishes, as described in the linked machine comparison. And the setup doesn't replace a light source: without a spot light you can't see what's happening on the paint, before or after Pps.

Detailing1-Insight: The one we see most often is reason 1, because almost everyone inspects without a degreaser at first. Our trick for it: tape a straight edge down the middle of the test spot and polish only one half. Then pull the tape, spray Pps over both sides, wipe off and shine a light across it at an angle. If the edge stays sharp even after the inspection spray, with a clean reflection on one side and swirls on the other, your cut is real. If it blurs, the polish was filling, and you know before the first wash shows you.
No time for the whole post? Get it summarized:
Add Detailing1 as a preferred source on Google