


Tyre Dressing vs Rain: Spray, Gel or Coating, What Actually Stays on the Sidewall
Daniel von Detailing1 |


Koch-Chemie
Teerwäsche A "Tea" Bitumen & Tar Remover
Perfect bitumen and tar removers for a flawless finish
Koch-Chemie
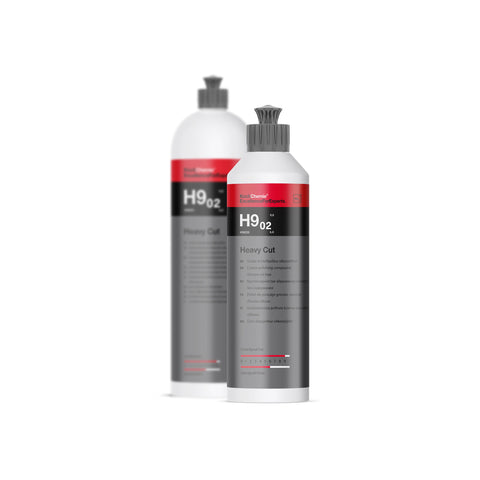
Heavy Cut "H9.02" Heavy Compound
Silikonölfreie grobe Schleifpolitur für tiefe Kratzer bis P1200


Koch-Chemie
Heavy Cut Foam Pad "Rot" Abrasive Cutting Foam / Polishing Pad (2024)
Extremely abrasive polishing pad for deep scratches and weathering
Koch-Chemie
One Cut & Finish "P6.02" High-Gloss Polish with Sealant
Effective high-gloss polish and sealant for scratch removal
Koch-Chemie
Fine Cut "F6.01" Cutting Polish (Fine)
Fine abrasive polish for brilliant deep gloss and perfect paintwork


Koch-Chemie
Micro Cut Soft Foam Pad "Violett" (Soft) Anti-Hologram Foam / Polishing Pad (2024)
Soft polishing pad for delicate paints and a streak-free finish


Koch-Chemie
Fine Cut Foam Pad "Gelb" Medium-Hard Cutting Pad / Polishing Pad (2024)
Medium-hard sanding sponge for medium to deep scratches
Koch-Chemie
Micro Cut "M3.02" Micro-Abrasive Polish
For the removal of holograms & scratches on all paint types


Koch-Chemie
One Cut Foam Pad "Orange" Medium-Cut 2-in-1 Polishing Pad (2024)
Polishing pad for scratch removal and finishing in one step
Koch-Chemie
Micro Cut & Finish "P3.01" Micro Cutting Polish with Carnauba Wax
High-gloss micro-abrasive polish with integrated carnauba wax


The Rag Company
Car Wash 320GSM Microfibre Cloth
Fulfill your vehicle care with premium microfiber technology


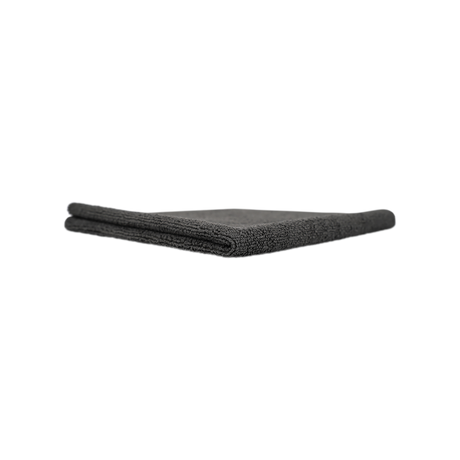


THE COLLECTION
"Allround / Coating 245" short-pile edgeless microfibre cloth (245 GSM)
Short-pile edgeless microfiber cloth for precise removal
Koch-Chemie
Clay Spray "Cls" Clay Lube for Decon Clay
Advanced lubricant spray for the application of cleaning clays


THE COLLECTION
"Allround / Coating 300" short-pile edgeless microfibre cloth (300 GSM)
Low-pile 300 GSM microfiber cloth with extra substance
Koch-Chemie
Lack-Polish green "P1.03" Finishing Polish
Finish-Politur mit Schleifgrad 1,0 & Glanzgrad 9,5 für alle Lackarten
Koch-Chemie
Micro Cut "M2.02" High-Gloss Anti-Hologram Polish
Innovative polish for the permanent removal of holograms


Koch-Chemie
Polish & Sealing Foam Pad "Green" Soft Finishing Sponge / Polishing Pad (2024)
Extra soft finishing pad for a flawless finish


Koch-Chemie
Micro Cut Hard Foam Pad "Violett" (Hard) Anti-Hologram Pad / Polishing Pad (2024)
Hologram-free finish on high-solid paints with a hard polishing pad


THE COLLECTION
"Allround 365" short-pile edgeless microfibre cloth (365 GSM)
Short-pile Edgeless Microfiber Towel with more volume


Koch-Chemie
Metal Polish "Mep" Metal Polish
Effective Metal Polish for Shine and Protection
Koch-Chemie
Heavy Cut "H8.02" Heavy Compound Polish
Extremely powerful polish with maximum cut


SONAX
PROFILINE OS "02-06" High-Gloss Polish with Sealant (One-Step)
OS 02-06 — High-Gloss Polish with Sealant (One-Step)
Koch-Chemie


Koch-Chemie
Pro Allrounder Towel "315GSM" Microfibre Polishing Cloth
Premium Microfiber Polishing Cloth for Car Care

Car polish at Detailing1 uses aluminium-oxide abrasive to take off a wafer-thin layer of clearcoat and open up a level, glossable surface underneath. The range runs from heavy cutting compound through finishing polishes for hologram-free gloss to all-in-one polish with a sealant, plus special cases for gelcoat, glass and metal. Brands stocked are Koch-Chemie, SONAX, GYEON, Meguiar's, CarPro and ZviZZer.
Koch-Chemie
Heavy Cut "H9.02" Heavy Compound
Silikonölfreie grobe Schleifpolitur für tiefe Kratzer bis P1200
Koch-Chemie
One Cut & Finish "P6.02" High-Gloss Polish with Sealant
Effective high-gloss polish and sealant for scratch removal
Koch-Chemie
Fine Cut "F6.01" Cutting Polish (Fine)
Fine abrasive polish for brilliant deep gloss and perfect paintwork
Koch-Chemie
Micro Cut "M3.02" Micro-Abrasive Polish
For the removal of holograms & scratches on all paint types
Koch-Chemie
Micro Cut & Finish "P3.01" Micro Cutting Polish with Carnauba Wax
High-gloss micro-abrasive polish with integrated carnauba wax
Koch-Chemie
Lack-Polish green "P1.03" Finishing Polish
Finish-Politur mit Schleifgrad 1,0 & Glanzgrad 9,5 für alle Lackarten
Koch-Chemie
Micro Cut "M2.02" High-Gloss Anti-Hologram Polish
Innovative polish for the permanent removal of holograms
SONAX
PROFILINE OS "02-06" High-Gloss Polish with Sealant (One-Step)
OS 02-06 — High-Gloss Polish with Sealant (One-Step)
Koch-Chemie
Heavy Cut "H8.02" Heavy Compound Polish
Extremely powerful polish with maximum cut

Koch-Chemie
Lack-Polish violett "P2.03" Abrasive Gloss Polish
Abrasive high-gloss polish, correction and high gloss in one step


SONAX
PROFILINE EX "04-06" High-Gloss Polish (Finish)
Silikonöl-, & Staubfreie Hochglanzpolitur für Exzenterpolierer


Koch-Chemie
"ShineSpeedPolish" Finishing Polish (High Gloss)
Gives your vehicle a flawless high gloss finish

At Detailing1, polishing pads and sanding sponges decide — through hardness and cell structure — how much clear coat a polish actually cuts, from the coarse sanding sponge to the soft finishing pad for sealing. The range runs from foam pads in every grade through wool and microfibre to the felt pad for glass, in sizes from spot correction to the big panel. Brands on the shelf: ZviZZer, Koch-Chemie, SONAX, Rupes, FLEX and GYEON.
Koch-Chemie
Heavy Cut Foam Pad "Rot" Abrasive Cutting Foam / Polishing Pad (2024)
Extremely abrasive polishing pad for deep scratches and weathering
Koch-Chemie
Micro Cut Soft Foam Pad "Violett" (Soft) Anti-Hologram Foam / Polishing Pad (2024)
Soft polishing pad for delicate paints and a streak-free finish
Koch-Chemie
Fine Cut Foam Pad "Gelb" Medium-Hard Cutting Pad / Polishing Pad (2024)
Medium-hard sanding sponge for medium to deep scratches
Koch-Chemie
One Cut Foam Pad "Orange" Medium-Cut 2-in-1 Polishing Pad (2024)
Polishing pad for scratch removal and finishing in one step
Koch-Chemie
Polish & Sealing Foam Pad "Green" Soft Finishing Sponge / Polishing Pad (2024)
Extra soft finishing pad for a flawless finish
Koch-Chemie
Micro Cut Hard Foam Pad "Violett" (Hard) Anti-Hologram Pad / Polishing Pad (2024)
Hologram-free finish on high-solid paints with a hard polishing pad


Koch-Chemie
Micro-Cut Pad "Violet" Polishing Pad Foam Cutting Pad


SONAX
SONAX PROFILINE ExzenterPad medium polishing pad
Orbital Pad medium — Medium-cut polishing pad for DA orbital polishers


SONAX
PROFILINE ExzenterPad hart polishing pad
ExzenterPad hart — Profi-Polierpad für DA-Exzenterpolierer


FLEX
Backing Plate "M14" (Cushioned)
Damped polishing pad with M14 thread for precise polishing


Rupes
"D-A" Coarse (9.MF Series H) Microfibre Polishing Pad Blue
Extreme cutting performance and perfect results for hard clear coats


Rupes
"D-A" Medium Wool (9.NW Series M) Wool Polishing Pad Yellow
Flexible Wool Polishing Pads for Perfect Results

Poliermaschinen unterscheiden sich in ihrer Bewegung und in der Führung unter Last. Exzenter mit Freilauf, Zwangsrotation und reine Rotation erfüllen unterschiedliche Anforderungen an Kontrolle und Abtrag. Hub, Padgröße, Antrieb und Zubehöranschluss werden nach der geplanten Arbeit gewählt; das Werkzeug arbeitet immer als Teil eines Poliersystems.
FLEX
Backing Plate "M14" (Cushioned)
Damped polishing pad with M14 thread for precise polishing

Rupes
BigFoot "LHR15" Mark V 15mm Random Orbital Polisher Ø125mm
Precise and quiet thanks to innovative technology

FLEX
"Special" Backing Plate (Cushioned) for FLEX Dual-Action Polishers
Damped backing plate for FLEX random orbital polishers


FLEX
Velcro hook and loop backing pads for the FLEX PXE 80 in Ø30/50/75mm
FLEX
FLEX "XFE 2 15 14-EC C" 15mm Random Orbital Polisher with Free Spin Ø150mm
Professional orbital polisher for a hologram-free finish

Rupes
BigFoot "LHR21" Mark V 21mm Dual Action Polisher Ø150mm
Ergonomic design and innovative technology

Rupes
BigFoot "LHR21" Mark III 21mm Random Orbital Polisher Ø150mm
Professionelle Poliermaschine für schnelle und effektive Fahrzeugaufbe


FLEX
Interchangeable eccentric drive PXE 80 in rotary, 3, 6, and 12mm
FLEX
"XCE 2 8 14-EC C" 8mm Dual-Action Polisher with Forced Rotation Ø150mm
Forced Rotation Polisher for Precise Paint Correction

Rupes
BigFoot "LHR15" Mark III 15mm Random Orbital Polisher Ø125mm
Efficient and ergonomic polishing machine for professionals
FLEX
"PE 2 14-EC C" Rotary Polisher Ø150mm
Professional Rotary Polisher for Maximum Paint Correction

Rupes
BigFoot "LH19E" Rotary Polisher Ø125mm
High-performance rotary polisher for professional car care

Lackvorbereitung entfernt haftende Rückstände und bereitet die Oberfläche auf Politur oder Schutz vor. Reinigungsknete arbeitet mechanisch, ein passendes Gleitmittel unterstützt die Führung und Lackentfetter nehmen geeignete Öl- und Fettfilme ab. Die Reihenfolge richtet sich nach dem Zustand und dem anschließenden Oberflächenaufbau.
Koch-Chemie
Teerwäsche A "Tea" Bitumen & Tar Remover
Perfect bitumen and tar removers for a flawless finish
Koch-Chemie
Clay Spray "Cls" Clay Lube for Decon Clay
Advanced lubricant spray for the application of cleaning clays
Koch-Chemie
Koch-Chemie
Koch-Chemie Reinigungsknete "Rkb" Mild "Blau" Clay Bar
Gentle cleaning for paint and glass with detailing clay
TUGA Chemie
Flugrost-Teufel® Iron Fallout Remover
Acid-free rust remover with color change for paint and rims


GYEON
Q²M Iron (REDEFINED) Iron Remover
pH-neutral rust remover with gel formula and color indicator


Meguiars
Ultimate Iron Remover — Fallout & Iron Remover
Chemical rust remover with color indicator — purple = reaction


INNOVACAR
Effective rust remover for rims and car body
Koch-Chemie
Cleaning Clay "Rkr" Abrasive "Red" Clay Bar
Abrasive cleaning clay for heavily soiled paints


GYEON
Q²M TotalRemover Wax and Coating Remover
Q²M TotalRemover - wax and coating remover before


INNOVACAR
"DL" Lube Clay Bar Lubricant Spray
Efficient Lubricant for Clay Bar and Polishing Pads
The Rag Company
Effective paint cleaning and ideal preparation for wax and polish.
Spezialpolituren sind auf Materialien außerhalb des gewöhnlichen Lack-Poliergangs ausgerichtet. Glas, Metall, Scheinwerferkunststoff und freigegebene Lackschutzfolien verlangen unterschiedliche Arbeitsmedien und Rezepturen. Beschichtung und Defektart bestimmen die Auswahl; eine Lackpolitur ist nicht automatisch die passende Lösung für jede glatte Fläche.
Koch-Chemie
Metal Polish "Mep" Metal Polish
Effective Metal Polish for Shine and Protection


Koch-Chemie
Gelcoat One Cut "Gp6.01" High-Gloss Polish with Sealant for Gelcoats and Boat Paint (Marine Line)
Efficient one-step polish for gelcoats and boat paints with high gloss
Soft99
Glaco Glass Compound Roll On Glass Cleaner
Dual-Compound Glass Cleaner — Preparation for Sealants
Koch-Chemie
Headlight Polish 2 "Hlp2" high-gloss headlight polish with sealant
High-gloss headlight polish with integrated sealant


Koch-Chemie
Gelcoat Heavy Cut "Gh8.01" Heavy-Cut Compound for Gelcoat and Boat Paint (Marine Line)
Effectively removes deep scratches & hazing from heavy weathering


Koch-Chemie
Gelcoat Fine Cut "Gf6.01" Fine Cutting Polish for Gelcoat and Boat Paint (Marine Line)
Cutting polish for effective removal of medium scratches & oxidation


Koch-Chemie
Gelcoat Micro Cut & Finish "Gp3.01" Finishing Polish for Gelcoat and Boat Paint (Marine Line)
Finishing polish for effective removal of fine scratches and holograms
Koch-Chemie
Koch-Chemie Headlight Polish 1 "Hlp1" Heavy-Cut Headlight Polish
Fast scratch removal for heavily weathered headlights


SONAX
PROFILINE GlassPolish Glass Polish (Cerium Oxide Chemical-Mechanical)
GlassPolish - Cerium Oxide Glass Polish Chemical-Mechanical


SONAX
PROFILINE HeadlightPolish Headlight Polish
HeadlightPolish — Polish for polycarbonate headlights


Soft99
Glass Compound Z Glass Cleaner
Revolutionary glass cleaning for streak-free clarity


Koch-Chemie
Extremely abrasive polish for effective removal of deep scratches
Polierzubehör ergänzt den Poliergang dort, wo saubere Arbeitsmedien und passende Handhabung über das Ergebnis mitentscheiden. Pad-Reiniger lösen Rückstände, während weiteres Zubehör den Arbeitsablauf unterstützt. Die Auswahl folgt dem verwendeten System und Material; gereinigte Pads werden vor dem nächsten Einsatz vollständig vorbereitet.
The Rag Company
Car Wash 320GSM Microfibre Cloth
Fulfill your vehicle care with premium microfiber technology
THE COLLECTION
"Allround / Coating 245" short-pile edgeless microfibre cloth (245 GSM)
Short-pile edgeless microfiber cloth for precise removal
THE COLLECTION
"Allround / Coating 300" short-pile edgeless microfibre cloth (300 GSM)
Low-pile 300 GSM microfiber cloth with extra substance
THE COLLECTION
"Allround 365" short-pile edgeless microfibre cloth (365 GSM)
Short-pile Edgeless Microfiber Towel with more volume
Koch-Chemie
Pro Allrounder Towel "315GSM" Microfibre Polishing Cloth
Premium Microfiber Polishing Cloth for Car Care


D-CON
Happy End Edgeless 450GSM Microfibre Cloth
Fluffy microfiber cloth for streak-free, gentle car care


THE COLLECTION
"Dual Pile" long- and short-pile microfibre towel (420 GSM)
Double-sided microfiber towel for a precise finish


Koch-Chemie
Polish and Sealing Towel 520GSM Microfibre Cloth


Koch-Chemie
Coating Towel 300GSM Microfibre for Ceramic Coatings


The Rag Company
Eagle Edgeless 500GSM Microfibre Cloth
Ultimate 500GSM for perfect results without scratches.

Koch-Chemie
Fine Fiber Towel synthetic-leather drying cloth

Koch-Chemie
Masking Tape "50m" (Residue-Free Tape)
Precise Residue-Free Masking Tape

What actually happens when you polish a car? A polish uses fine abrasive grit to shave off a thin layer of clear coat, levelling scratches right down to their base. The cut takes material away, the finish brings the gloss back. At Detailing1 you get the polishes, pads and machines to do it.
Polishing a car means using abrasive grit to take off a wafer-thin layer of clear coat until the bottom of a scratch sits level with the surface around it. Nothing gets filled in. How much comes off isn’t down to the polish alone — it’s the interplay of polish, pad, machine and speed. So the first question on any job is how much clear coat you’ve actually got left.
Detailing1’s tip from the shop: What we see day-to-day is that the most common beginner’s mistake isn’t the wrong polish — it’s starting with the harshest one. We regularly see paint that’s been hit with a cutting compound and a hard pad when the job was really just light wash marks. Instead, set up a test patch of about 40 by 40 cm somewhere out of sight, like the lower part of the driver’s door, and start with the mildest combo on your shelf. If it does the job, you’ve saved clear coat. If it doesn’t, you step up one grade and then you know exactly why you needed it.
A polish doesn’t repair a scratch. It lowers the surface around it far enough that the scratch stops catching your eye, because no more light breaks on its edge.
The build-up on top is always the same: bare metal, primer, base coat with the colour, clear coat over it. You only ever polish the clear coat, and on a factory finish that’s a thin 40 to 50 µm — about half the thickness of a sheet of printer paper. Right under it the colour starts.
Go too far and you’ll spot it on the pad before you see it on the paint. A coloured haze on the foam means the clear coat is through, and that spot only comes back with a respray. That’s exactly what sets polishing apart from washing or sealing.
A paint depth gauge does the maths for you. It reads out in microns how much paint sits on a given spot and reveals differences you’d never guess from the outside. Edges, swage lines and wheel-arch curves naturally carry less material than a flat bonnet, because the paint flows away from those zones as it’s sprayed.
That gives you a simple rhythm. You wash weekly, seal two or three times a year, and polish as needed and sparingly. On most cars that’s only a few times in the whole life of the vehicle — each time only when the paint actually carries defects, not just when it looks dull.
And prep always comes first. Any particle still sitting in the paint turns into a cutter under the pad and drags a fresh line across the panel. So a wash, iron remover and clay bar all belong before the first polishing pass — you’ll find the full routine under Paint Preparation.
Cut means removal, finish means refinement. Both stages work with abrasive grit and still chase two completely different goals on the same panel.
The cut is about material. A coarse, sharp-edged grit cuts into the clear coat and takes out scratches, holograms and dull oxidation layers. The Koch-Chemie Heavy Cut „H9.02" Coarse Cutting Compound is the strongest grade for heavily scratched paint, while the Koch-Chemie Fine Cut „F6.01" Cutting Compound (Fine) is the mid option for everyday wear.
After the cut the paint is clean but not pretty. The coarse pass leaves its own very fine scratch pattern that shows up as a milky haze in sunlight. That’s exactly the pattern the finish clears: its grit is smaller and keeps breaking down as you work, so the cut tapers off to nearly nothing by the end. The Koch-Chemie Micro Cut „M2.02" High-Gloss Anti-Hologram Polish is our go-to answer for that.
For a lot of cars a single pass is enough. So-called one-step polishes cover cut and finish in one go, with less cut than a true compound and far more gloss than a pure finish. The Koch-Chemie One Cut & Finish „P6.02" High-Gloss Polish with Sealant is one of our best-sellers in this category and throws in a sealant on top.
Milder still is the Koch-Chemie Micro Cut & Finish „P3.01" Micro Cutting Compound with Carnauba Wax. It barely removes any material, but it smooths the grey haze off older paint and leaves carnauba wax behind as a protective layer. For a car that’s basically fine and just needs its depth back, that’s the more honest route than a cutting compound.
The call between one step and two is made on the test patch, not at the shelf. If a one-step combo clears the scratches in the test patch to your liking, there’s no reason to work any harder. You’ll find every cutting and finishing grade at a glance under Polishes.
The polish brings the grit, the pad brings the hardness, the machine brings the movement. Only together do the three add up to a given amount of cut.
Pads are graded by hardness and, with most makers, colour-coded. At Koch-Chemie the range runs from the Heavy Cut Foam Pad „Red" Abrasive Cutting Foam / Polishing Pad (2024) through the medium-hard One Cut Foam Pad „Orange" Medium-Hard 2-in-1 Cutting Foam / Polishing Pad (2024) and the Fine Cut Foam Pad „Yellow" Medium-Hard Cutting Foam / Polishing Pad (2024) down to the soft Micro Cut Soft Foam Pad „Violet" (Soft) Anti-Hologram Foam / Polishing Pad (2024).
Right at the end of the range sits the Polish & Sealing Foam Pad „Green" Soft Finishing Foam / Polishing Pad (2024). It barely cuts at all any more — instead it spreads sealants and waxes evenly. Run a cutting compound on it and you’ll rightly wonder why nothing’s happening.
At SONAX the SONAX PROFILINE ExzenterPad Hard Polishing Pad and the SONAX PROFILINE ExzenterPad Medium Polishing Pad take on the same roles. What matters is the build: dual-action pads are matched to the free throw of the machine and behave differently from pads made for rotary machines. Wool pads cut harder than any foam and belong in experienced hands on hard paint.
On the machine side there are three builds. The dual-action spins the pad freely and stalls the rotation the moment you push, which all but rules out burn-through and makes it the safe pick to start on. The forced rotation locks throw and spin together, so it works faster and still stays forgiving. The classic rotary has the most cut and, in the wrong hands, throws up exactly the holograms we’ll get to later. You’ll find the choice under Polishing Machines.
Two practical details hang on that. The pad should be about 15 to 25 mm larger than the backing plate, otherwise the edge of the plate eventually catches the paint. And a pad is saturated after roughly two panels: it stops taking up polish, warms up and smears. Brushing it out or swapping it mid-job costs you twenty seconds and saves the result. The full line-up is under Polishing Pads and Foam Pads.
The same polish-and-pad combo gives a completely different result depending on how you run it. Three things set that: speed, pressure and how fast you move across the surface.
You run the speed in stages. Spread the drops of polish over the patch on the lowest setting so nothing flicks off, then work on the top half of the dial, and drop back two stages again for the last pass. That slow final pass takes the grit to its end under control instead of tearing it off abruptly.
For pressure, the weight of the machine plus a light push from your palm is enough. On a dual-action you can check it directly: draw a line across the pad with a marker. As long as the line is visibly spinning, the machine is working. If it stands still, you’re pushing too hard and just dragging the pad across the paint.
The pass rate decides how much time the grit gets to work. A patch of about 40 by 40 cm works well, run in four to six slow passes, each overlapping by half and crosshatched — horizontal first, then vertical. Wipe across it too fast and you’re just spreading polish instead of using it.
Heat is the quiet source of mistakes. The paint should feel hand-warm, not hot, and no polish belongs in blazing sun. Once the polish dries out under the pad, it stops cutting and starts to smear. A fresh drop then beats another pass on a dry patch.
Edges, swage lines and narrow pillars get special treatment. There’s less clear coat there, and only part of the pad sits on the surface, which drives the pressure per square centimetre right up. Masking them off with painter’s tape is the fastest protection; otherwise you work the edges by hand with a soft applicator.
Holograms are fine, arc-shaped scratch marks that hover over the paint like a three-dimensional haze under direct sun or a point light. In the scene they’re also called buffer trails.
They almost always come from one of three causes: grit that’s too coarse with no finishing pass after it, a rotary spun too fast, or a pad that was already full and dry. They show clearest on dark paint; on silver and white you often only find them once the car is outside in the sun.
The reason they show up so late is in the polish itself. Alongside the abrasive grit it holds oils and solvents that soak into the freshly opened paint and mask fine marks optically. As long as that film is there, you see a better result than the one you actually worked. A few washes later the film is gone and the marks are back.
A panel wipe sorts that. Behind it is a diluted alcohol solution, usually isopropanol with water, that lifts oils and silicones off without residue and without attacking the paint. In plain terms: after wiping you see the bare clear coat and with it your real result, instead of kidding yourself.
The routine is simple. After each finished panel, wipe it down once with panel wipe and a clean microfibre, then check it in raking light. A handheld LED with a focused beam shows you more than any ceiling light, because it throws a hard reflection that gives away every flaw in the paint.
If you find holograms, the answer is a finishing pass, not another round of cutting. The Koch-Chemie Micro Cut „M2.02" High-Gloss Anti-Hologram Polish on a soft pad, reduced speed, little pressure. Only once the surface stays clean after the wipe-down does protection go on — everything for that is under Sealing and Care.
You polish when the paint carries defects you can see and feel. If it only looks dull, it’s often the sealant that’s due, not the machine.
The fingernail test sorts things fast. Run your nail across the scratch: if it noticeably catches, the scratch runs deeper than what you can safely take off, and that spot belongs in a paint repair. If the surface feels smooth and the scratch is still visible, it sits in the clear coat and can be polished out.
The classic case is swirls — the fine circular wash marks from brush car washes and tired sponges that look like a spider’s web in the sun. For those a one-step combo is usually enough. If you’re polishing for the first time, the Koch-Chemie One Cut & Finish „P6.02" High-Gloss Polish with Sealant on the One Cut Foam Pad „Orange" Medium-Hard 2-in-1 Cutting Foam / Polishing Pad (2024) is the combo with the biggest safety margin to spare.
If the paint carries deeper marks, bird-dropping etching or a dull oxidation layer, there’s no way around two steps. Then you start with the Koch-Chemie Heavy Cut „H9.02" Coarse Cutting Compound on the Heavy Cut Foam Pad „Red" Abrasive Cutting Foam / Polishing Pad (2024) and lay the finish over it with the Micro Cut Soft Foam Pad „Violet" (Soft) Anti-Hologram Foam / Polishing Pad (2024) on top.
There’s a special case for boats. Gelcoat isn’t clear coat but a pigmented polyester layer that goes on much thicker and chalks up heavily under UV load. That’s what the Koch-Chemie Gelcoat One Cut „Gp6.01" High-Gloss Polish with Sealant for Gelcoats and Marine Finishes (Marine Line) is built for, with a formulation that would be too coarse on car paint.
And if you’re not sure whether the car even needs polishing: wash it, decontaminate it via the Paint Preparation and then take a look at it in raking light. Clean paint regularly looks better than you expected. Whatever still bothers you after that is your reason to reach for the machine — and everything else is a question of protection, not cut.
Too much choice in polishing? Get help picking:
Daniel von Detailing1 |

Daniel von Detailing1 |

Daniel von Detailing1 |

Daniel von Detailing1 |

Daniel von Detailing1 |

Daniel von Detailing1 |

Daniel von Detailing1 |

Daniel von Detailing1 |

Daniel von Detailing1 |

Daniel von Detailing1 |

Jasper von Detailing1 |

Daniel von Detailing1 |